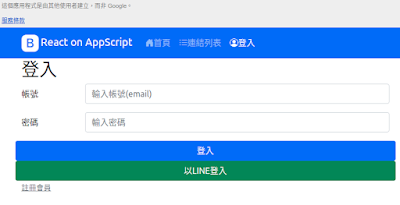
這篇要實施LINE登入的功能,建議先閱讀我之前寫的LINE登入流程一文,下面會假定您已經知道該如何成為LINE開發者,只進行登入系統的LINE整合。
前言
這裡整合LINE登入並沒有與會員帳號做榜定,而是讓所有LINE使用者都能夠一鍵登入。而LINE登入流程都是手工打造,沒有使用額外套件。
1. HTML及打包的部份
設定Apps Script目錄及網頁
在進入到react之後,其實我們在用戶端都只有一組網頁和react的js檔案,但是在LINE登入這裡我們用戶端還需要一個網頁呈現登入成功訊息,另一個網頁呈現失敗訊息,所以我們要先設定一個目錄給它,就需要調整webpack的設定webpack.config.js,這裡在CopyWebpackPlugin外掛裡頭加入assets目錄,要求要拷貝所有的檔案成用戶端可用的網頁。
...
const copyFilesConfig = {
name: 'COPY FILES - appsscript.json',
mode: 'production', // unnecessary for this config, but removes console warning
entry: copyAppscriptEntry,
output: {
path: destination,
},
plugins: [
new CopyWebpackPlugin({
patterns: [
{
from: 'assets',
to: destination,
},
{
from: copyAppscriptEntry,
to: destination,
},
],
}),
],
};
登入失敗頁面
這裡沒寫什麼,就請使用者回首頁。
assets/failure.html
<!DOCTYPE html>
<html>
<head>
<base target="_top" href="<?= baseUrl ?>">
</head>
<body>
<h1>LINE登入失敗</h1>
<p>錯誤:<?= error ?></p>
<p>描述:<?= error_description ?></p>
<a href="exec">點一下回首頁</a>
</body>
</html>
登入成功頁面
- 使用localStorage把登入資料儲存起來,讓使用者點擊首頁頁面時會讀取得到這個登入資料。
- 使用google.script.history.replace是為了把LINE登入給予的資料做清除,避免使用者重新整理該頁時,使用已經逾時的資訊向LINE伺服器確認。
- 最後只是想把以上script做隱藏,只留下基本的HTML資料。
assets/success.html
<!DOCTYPE html>
<html>
<head>
<base target="_top" href="<?= baseUrl ?>">
</head>
<body>
<h1>LINE登入成功</h1>
<p>歡迎您:<?= loginName ?>使用LINE登入</p>
<p>請點一下<a href="exec">這裡</a>回首頁</p>
<script>
localStorage.setItem('user-token', <?= loginToken ?>);
google.script.history.replace(null, '', ''); // remove params and hash
// remove all scripts
document.querySelectorAll('script').forEach(function (s) {
s.parentNode.removeChild(s)
});
</script>
</body>
</html>
2. React的部份(前端/使用者端)
製作LINE登入按鈕
新增lineLoginUrl部份,如果給定LINE登入的URL就會秀出'以LINE登入'的按鈕
src/client/demo-bootstrap/components/LoginForm.jsx
const LoginForm = ({
...
lineLoginUrl,
}) => {
...
<Row>
{lineLoginUrl && (
<a href={lineLoginUrl} className="btn btn-success">以LINE登入</a>
)}
</Row>
...
LoginForm.defaultProps = {
...
lineLoginUrl: null,
};
LoginForm.propTypes = {
...
lineLoginUrl: PropTypes.string,
};
在登入頁面施作LINE登入的URL,這裡會從環境變數裡頭抓取LINE,實際上我們要在本機上,新增.env檔案,把LINE登入的channel id和callback url設定在裡頭。
src/client/demo-bootstrap/pages/Login.jsx
...
const LINE_AUTH_URL = 'https://access.line.me/oauth2/v2.1/authorize';
const CHANNEL_ID = process.env.LINE_CHANNEL_ID;
const CALLBACK_URL = process.env.SERVER_URL;
const STATE = process.env.LINE_STATE;
const NONCE = process.env.LINE_NONCE;
const LINE_LOGIN_URL = `${LINE_AUTH_URL}?response_type=code&client_id=${CHANNEL_ID}&redirect_uri=${CALLBACK_URL}&state=${STATE}&scope=profile%20openid&nonce=${NONCE}`;
...
<LoginForm
onSubmit={onSubmit}
isSubmiting={submiting}
lineLoginUrl={LINE_LOGIN_URL}
/>
...
3. Apps Script的部份(後端/伺服端)
新增權限讓後端可以連接到LINE伺服器
權限部份因為LINE登入流程,後端伺服器需要與LINE取得使用者token所以會需要fetchApp連接外部伺服器的權限。
"oauthScopes": [
...
"https://www.googleapis.com/auth/script.external_request"
],
新增LINE登入的Oauth實作
會使用到新的設定LINE_CONFIG與user的LINE登入功能,中間的登入流程就請參照我之前的文章。
src/server/oauth/line.js
import { LINE_CONFIG, SERVER_URL } from '../settings';
import { loginByLineId } from '../user';
const outputFailure = (error, desc) => {
const template = HtmlService.createTemplateFromFile('failure');
template.baseUrl = SERVER_URL;
template.error = error;
template.error_description = desc;
return template.evaluate();
};
const outputSuccess = ({ token, name, id }) => {
const template = HtmlService.createTemplateFromFile('success');
template.baseUrl = SERVER_URL;
template.loginToken = token;
template.loginName = name;
template.loginUid = id;
return template.evaluate();
};
const logErrorAndOutput = error => {
Logger.log('logErrorAndOutput', error);
return outputFailure(error.message, JSON.stringify(error));
};
function decodeJwtInObjectForm(jwt) {
const payload = jwt.split('.')[1];
const blob = Utilities.newBlob(
Utilities.base64DecodeWebSafe(payload, Utilities.Charset.UTF_8)
);
return JSON.parse(blob.getDataAsString());
}
const parseLineLogin = json => {
const lineUser = decodeJwtInObjectForm(json.id_token);
const nowTime = Date.now();
if (lineUser.exp > nowTime)
throw new Error(`login token expired, ${lineUser.exp}>=${nowTime}`);
return lineUser;
};
const fetchToken = code => {
const response = UrlFetchApp.fetch(LINE_CONFIG.tokenUrl, {
contentType: 'application/x-www-form-urlencoded',
method: 'post',
payload: {
grant_type: 'authorization_code',
redirect_uri: LINE_CONFIG.callbackUrl,
code,
client_id: LINE_CONFIG.channelId,
client_secret: LINE_CONFIG.channelSecret,
},
});
return JSON.parse(response.getContentText());
};
const OAuth = ({ state, code, error, error_description: errorDesc }) => {
if (error) return outputFailure(error, errorDesc);
const serverState = LINE_CONFIG.loginState;
if (!state || state !== serverState || !code)
return outputFailure(error, errorDesc);
try {
const lineLogin = parseLineLogin(fetchToken(code));
const ourLogin = loginByLineId(lineLogin.sub);
return outputSuccess({
token: ourLogin.token,
id: lineLogin.sub,
name: lineLogin.name,
});
} catch (except) {
return logErrorAndOutput(except);
}
};
export default OAuth;
後端設定參數增加
src/server/settings.js
export const LINE_CONFIG = {
tokenUrl: 'https://api.line.me/oauth2/v2.1/token',
callbackUrl: process.env.SERVER_URL,
channelId: process.env.LINE_CHANNEL_ID,
channelSecret: process.env.LINE_CHANNEL_SECRET,
loginState: process.env.LINE_STATE,
};
後端doGet調整
在doGet部份因為LINE登入需要的額外的參數就進行相關改寫,取回了state, code, error, error_description資訊。
src/server/web.js
import { WEB_TITLE } from './settings';
import handlers from './handlers';
export function doGet(req) {
let { show, state, name } = req.parameter;
if (state != null) {
show = 'oauth';
name = {
state: state,
code: req.parameter.code,
error: req.parameter.error,
error_description: req.parameter.error_description,
};
} else if (show == null) {
show = 'default';
}
const h = handlers(show);
const output = h.func(name, h.pass);
if (h.immediateRetrun) return output;
output.setTitle(WEB_TITLE);
output.addMetaTag('viewport', 'width=device-width, initial-scale=1');
return output;
}
在doGet的Handler新增LINE登入的
src/server/handlers.js
...
import LineOAuth from './oauth/line';
const Handlers = {
...
oauth: {
func: LineOAuth,
immediateRetrun: true,
},
...
4. 成果展示

留言